Power supply and first start
The USB-C supply and cable the SeedHammer II needs, what it does when it gets power, and what the start screen offers.
Take a new SeedHammer II from the box to its first engraved plate on firmware v1.4.3. In this order: check the version and upgrade if needed (Firmware upgrade), choose the power supply, engrave each seed (Enter a seed), engrave the descriptor (Send a descriptor with NFC Tools; multisig: What fits on a plate) and rehearse a restore.
Seed words are typed on the machine's touchscreen only and never pass through a phone, a computer or a chat assistant.
What you need
- The machine and the 240 W USB-C cable from the box. The box holds no power supply and no paper instructions.
- A USB-C Power Delivery (PD) supply that offers 20 V or 28 V at 5 A (Choose the power supply).
- Blank 85 x 85 mm plates, more than five: SeedHammer II plates or SH02 steel plates. Each job engraves one face.
- Hearing protection. The machine asks for it before every job.
Choose the power supply
At power-up the machine asks for the highest voltage from 20 V to 28 V that the supply offers, and starts only if that offer carries 3 A or more (If it does not work). The watts on the label do not count. It tests the supply again when the engraver starts ("engraver: not enough power available").
| PD offer | Use |
|---|---|
| 20 V or 28 V at 5 A (sold as 100 W or 140 W) | Buy. Prefer 28 V: it strikes harder than 20 V, so plates come out deeper and crisper (depth). 28 V needs a 28 V port and a 5 A EPR cable such as the one in the box |
| 20 V at 3 A (60 W) | Passes the power-up test; a full job is unverified |
- Read the label: it must list
20Vor28Vat 5 A. Some cheap chargers sold as 95 W or 28 V never deliver them. - On a multi-port charger, use the port with that offer. A single-port charger is less likely to drop power mid-job.
- Mains voltage does not matter. A computer's USB port is for a firmware upgrade only.
Switch it on
- Plug the cable into the supply.
- Plug the other end into the machine's USB-C port. It starts at once and shows the green start screen.
- The engraving head moves by itself to its homing corner, then to its start position over the plate area. Normal.
- To switch off, unplug the cable. Nothing is kept after power-off.
The start screen
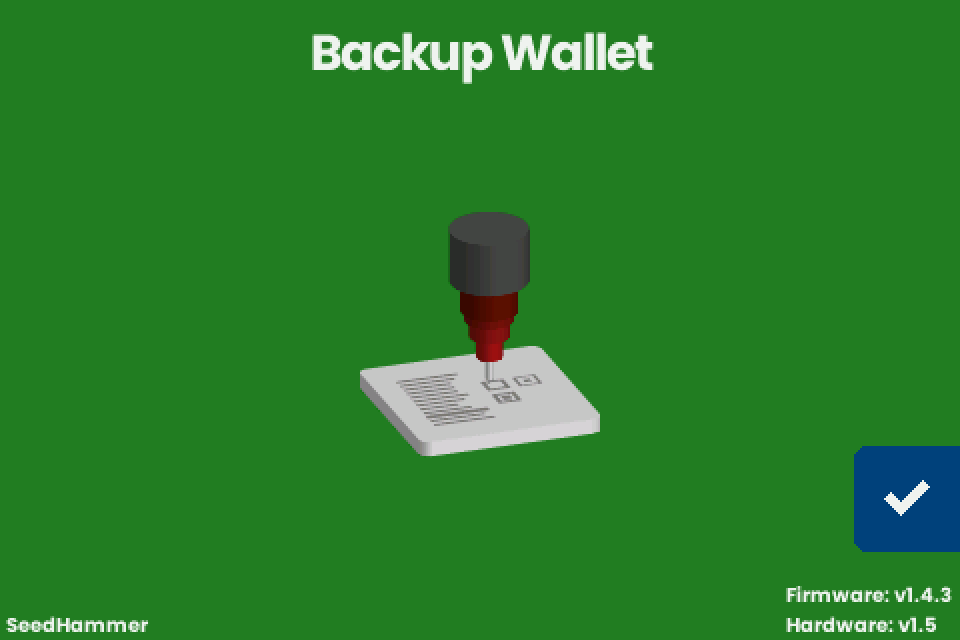
| Where | Shows |
|---|---|
| Title | "Backup Wallet", over a drawing of the hammer head above a plate |
| Bottom | Left: "SeedHammer". Right: "Firmware: v1.4.3" and, below it, the hardware line, for example "Hardware: v1.5". The firmware adds " (UNLOCKED)" to the hardware line unless secure boot is on and the SeedHammer key is the only valid boot key (Read the lock mark). A version that starts with v2 is an older beta (version) |
| Right edge | One button: the dark-blue tab with a checkmark, at the bottom. Tap it to type a seed (Enter a seed on the touchscreen) |
| NFC | Listens on this screen only: stay here to send a descriptor (Send a descriptor with NFC Tools). A descriptor reveals every address of the wallet; it holds no secret. During a transfer a status line shows for about one second: "Scanning...", then "Unknown format" or "Scan error" if the machine cannot use the data. Usable data opens the next screen |
| Whole screen | After 3 minutes without a touch, an animation covers this and every other screen. The first touch wakes it and presses nothing |
Load a plate and engrave
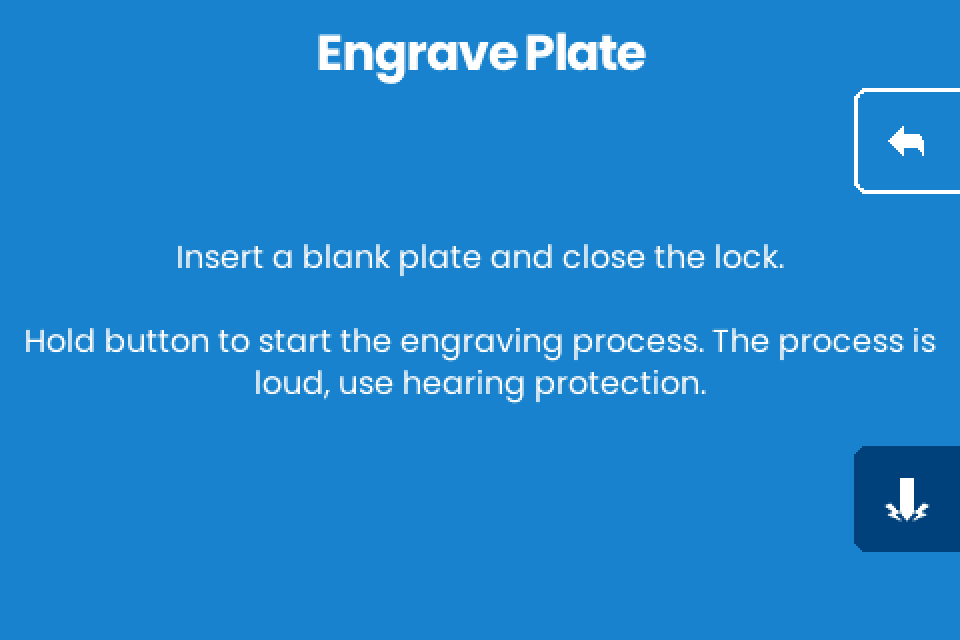
- On the blue "Engrave Plate" screen, the last of every flow, insert a blank plate and close the lock.
- Put on hearing protection.
- Hold the hammer tab at the bottom of the right edge until its ring fills (1 second) and the job starts.
- On "Engraving completed successfully.", tap the right arrow at the bottom of the right edge.
- Open the lock and take the plate out.
| Screen | Meaning |
|---|---|
| "Insert a blank plate and close the lock." followed by "Hold button to start the engraving process. The process is loud, use hearing protection." | Nothing engraved yet. Let go of the hammer tab before the ring is full and nothing starts. The back arrow at the top leaves without engraving |
| "M:SS" above "Engraving plate" | Time left. The screen saver can cover it; the machine keeps engraving. To stop, tap the left arrow at the top of the right edge |
| "Engraving stopping...", then "Engraving paused." with "Hold button to resume." below it | Stopped. Hold the hammer tab to resume from the stop point. The back arrow here drops the stop point (Retry and restart) |
| "Engraving completed successfully." | Done. The right arrow returns to the start screen |
| "Engraving failed." with "Hold button to retry." and a line starting "Error: " | The job stopped: Retry and restart, Engraving |
If it does not work
| Symptom | Cause | Fix |
|---|---|---|
| Screen stays dark, or only the backlight comes on, also right after a firmware upgrade | No offer of 20 V to 28 V at 3 A or more, so the machine restarted into firmware upgrade mode (a USB drive on a computer). Normal after an upgrade on a computer port without 20 V PD: the new firmware goes straight back into upgrade mode | Connect a USB-C PD supply that offers 20 V or 28 V at 5 A, with the cable from the box, and confirm "Firmware: v1.4.3" on the start screen |
| Restarts over and over at power-up | The protection of the Apple 140 W and some other 140 W chargers can trip while the machine's capacitors charge (unverified) | Try another charger with the cable from the box |
| Stops mid-job and returns to the start screen | Most likely a short power drop from the charger restarted the machine. Nothing is kept, so the job cannot resume | Start it again on a single-port charger that offers 20 V or 28 V at 5 A (Retry and restart) |
| "Engraving failed." with "Error: engraver: not enough power available" | The supply cannot feed the engraver | Hold the hammer tab to retry on the same supply. To change the supply, unplug (nothing is kept), connect 20 V or 28 V at 5 A and start the job again: type the seed or send the descriptor again |
| A charger sold as 28 V delivers only 20 V or 5 V | The cable is not rated 5 A EPR | Use the cable from the box and the charger's 28 V port |